Quick Start Guide
In this short guide we will make your very first game in Glory. It is a simple game but it should help you to grasp the basics of using the editor, as well creating your own scripts to create custom behaviors.
The Hub
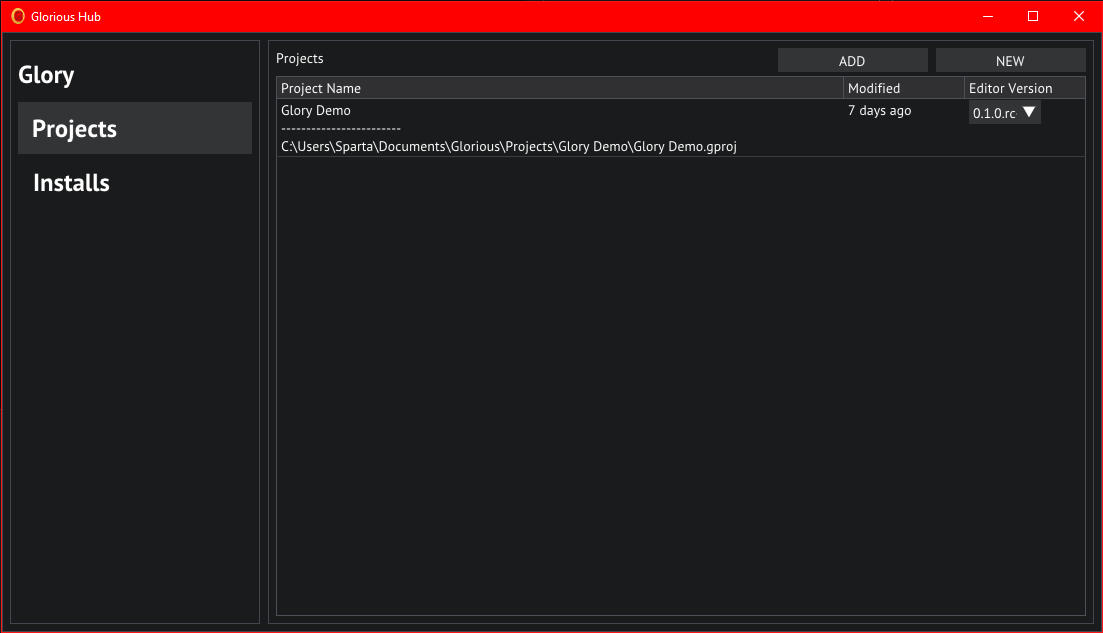
Project hub
Let's start by opening the project hub, this is the GloriousLauncher.exe that came packaged with your download.
In the project hub we'll click on the NEW button in the top right, this will bring us to the new project wizzard.
Select the latest version of the editor you have installed under Editor Version and name the project "Glory Demo",
we'll use the Default template to get some basic assets and settings set up for us.
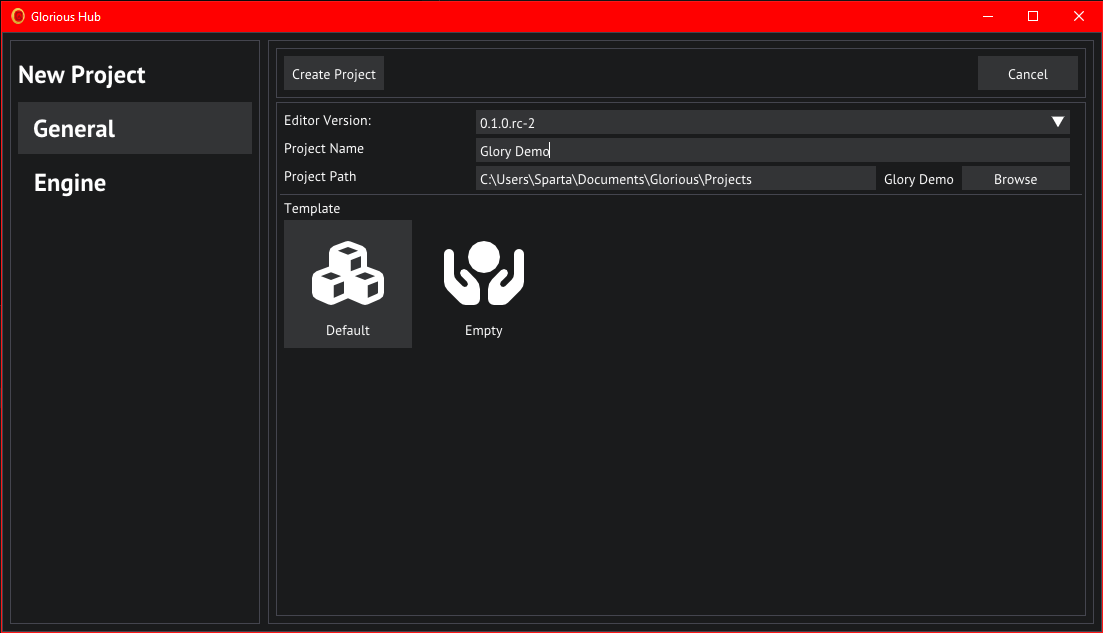
New project in hub
We will not be playing around with the Engine tab on the left, so have a look if you wish but leave the settings as default for this tutorial.
The Editor
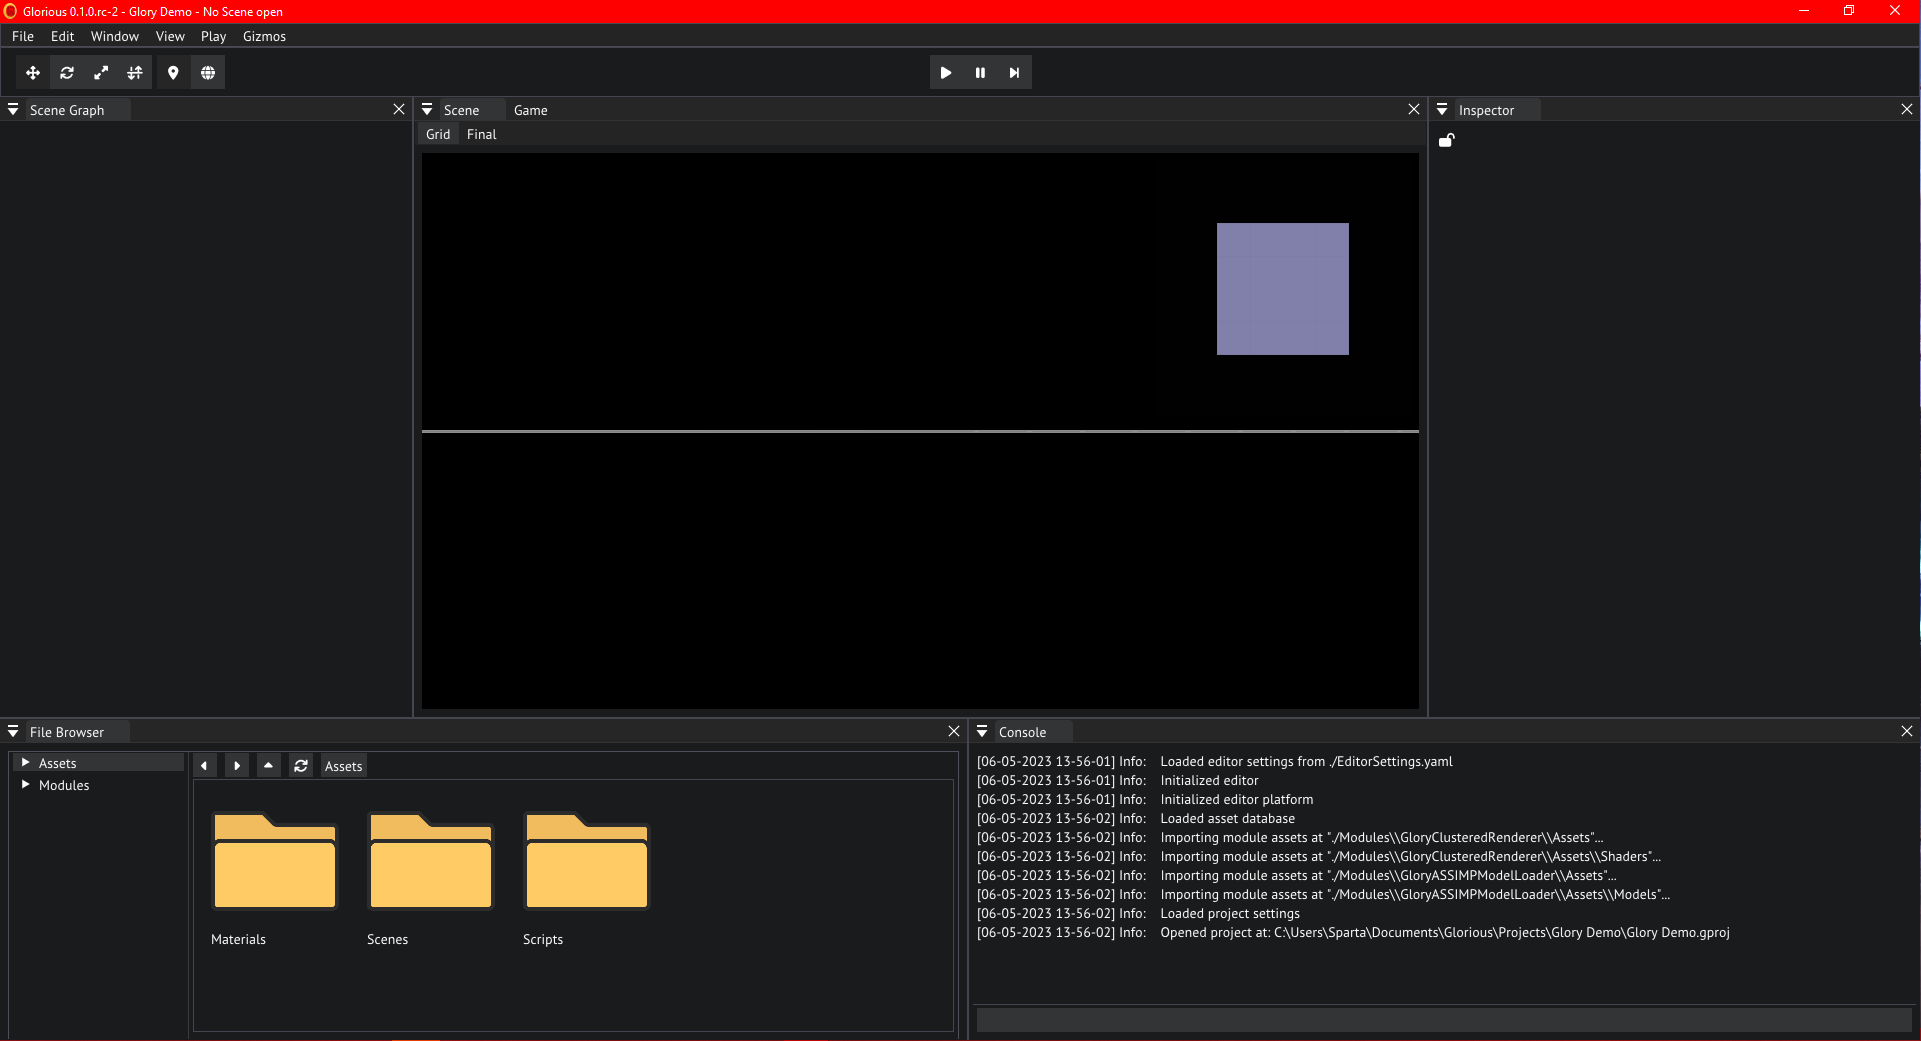
The editor
After project creation finishes the editor will open. Go ahead and open the SampleScene in the Scenes by first double clicking the folder and then the file.
Scene View
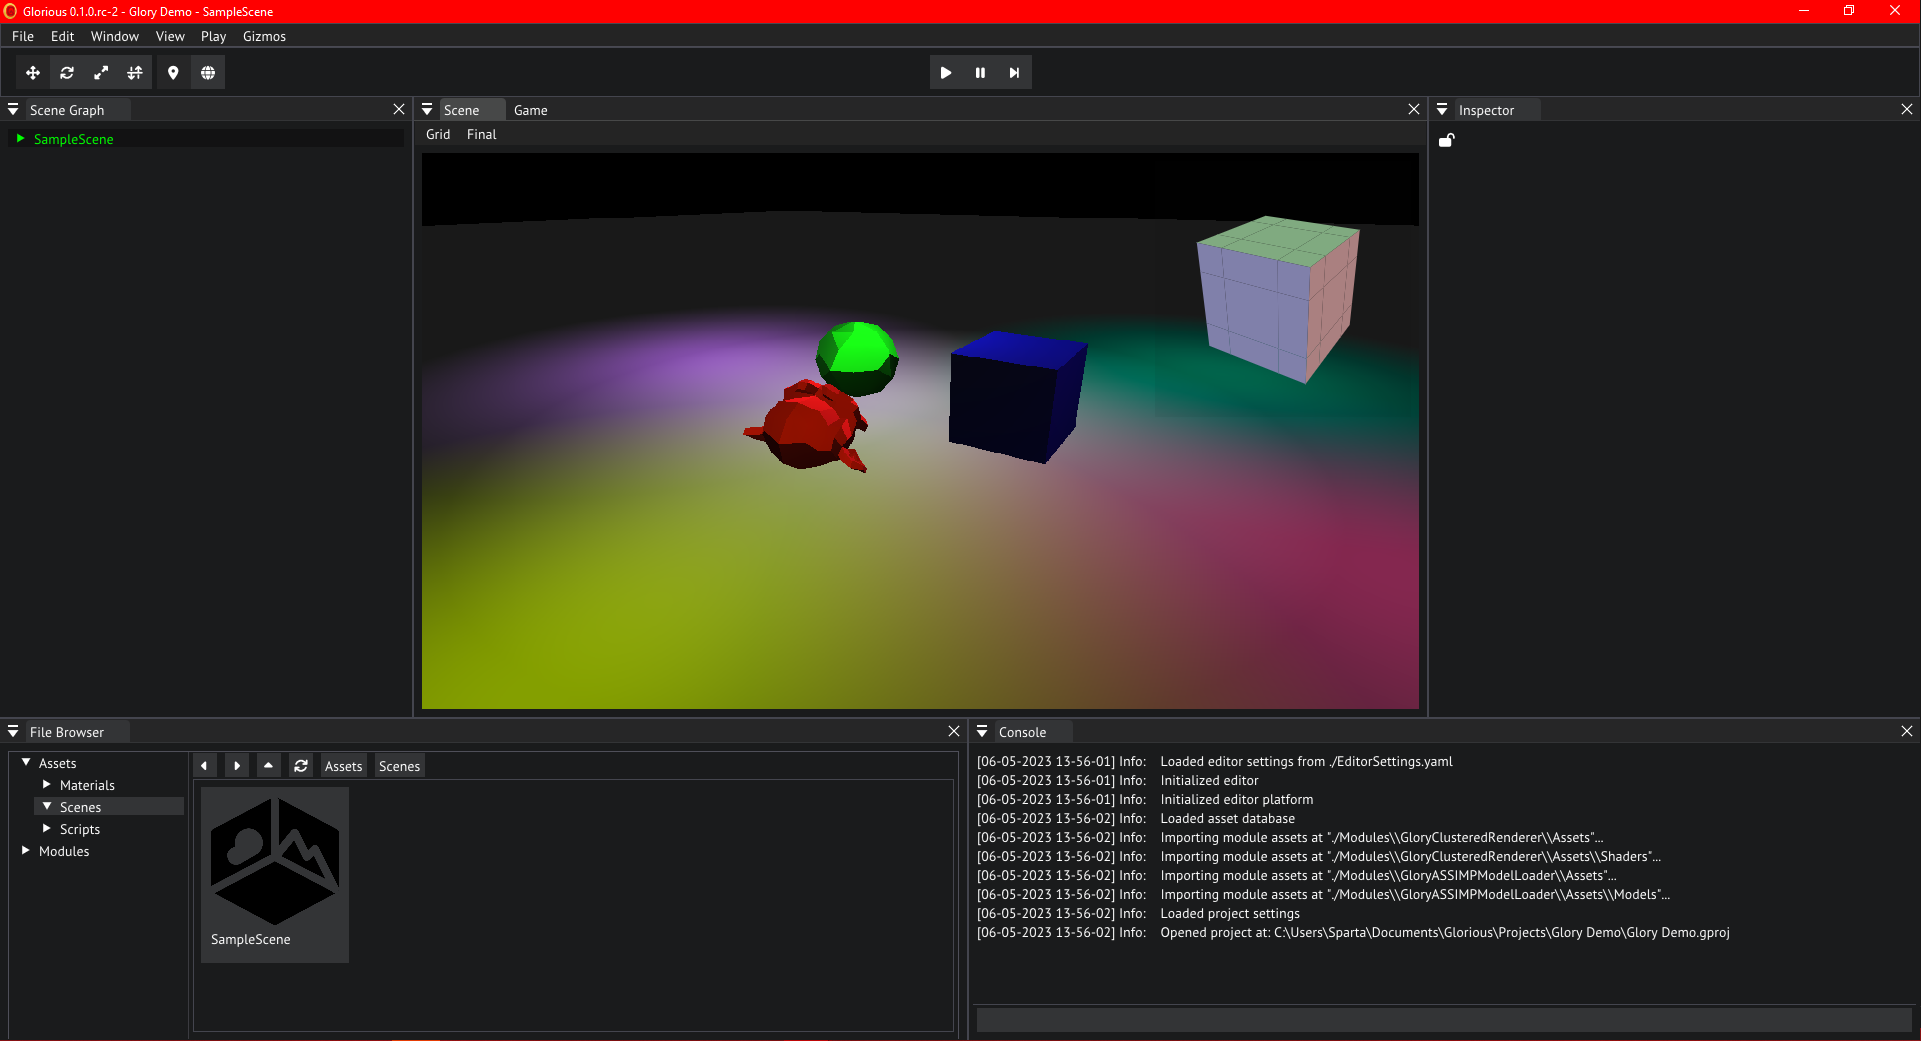
Sample scene in the default template
Let's take the time to get used to the interface and controls. Hold the right mouse button anywhere in the scene view and drag the mouse to look around. Use wasd to move relative to your look direction, and Q and E to move up and down. Hold shift to double the speed at which the camera will move.
Scene Graph
On the left of the editor you will find the scene graph, go ahead and unfold the SampleScene by double clicking its header or by clicking the arrow on the left of it.
We can see all objects currently in the scene, in this case these objects are entities because we are using the entity scenes module packaged with the engine. Go ahead and click on one of the lights.
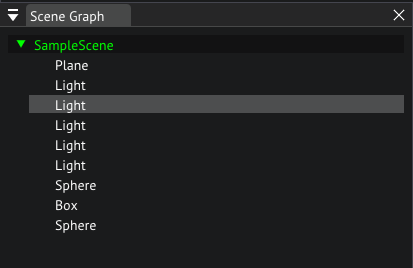
Scenegraph of the sample scene
If we now look at the right of the screen, we can see the inspector, this where you are able to change the properties of objects and assets. Let's play around with the intensity and color of this light, change it until you are satisfied.
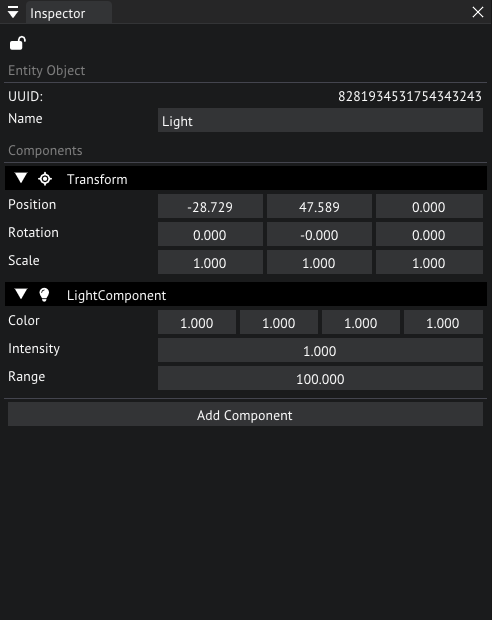
Inspector of one of the light objects
Now let's click on suzan in the scene view, it is the monkey head. We'll now see different components in the inspector. This entity makes use of a MeshRenderer to render a mesh asset. Try moving the object around with the gizmo in the scene. Enable the move gizmo with W and move the object around. You can also move it by manipuulating the values in the Transform component in the inspector.
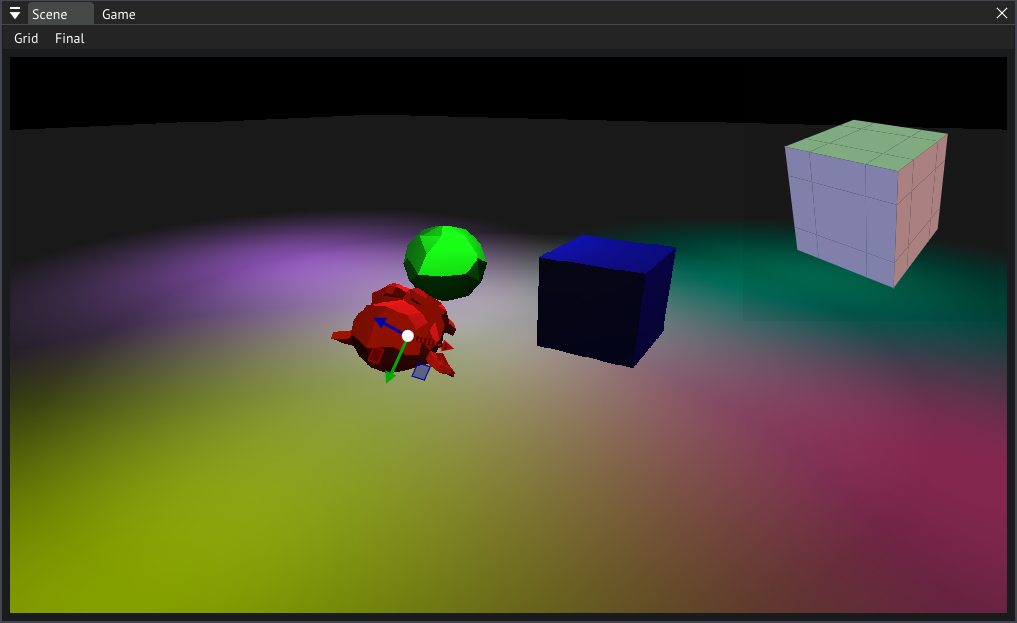
Scene view with Suzan selected in the sample scene
Press R on your keyboard, this switches to a rotation gizmo, now rotate the object until you are satisfied.
Next, press S on your keyboard, this switches to the scaling gizmo, scale the object until you are satisfied.
You can also press a shortcut multiple times to switch between World and Local space gizmos, this is usefull for when you want to move an object in the direction it is facing.
Camera
Our scene is currently missing a camera, this is an entity with a CameraComponent that will render our scene through the view of the player.
Right click the empty space in the Scene Graph and choose Create/Empty Object, after the object is created let's change the name in the inspector to Camera.
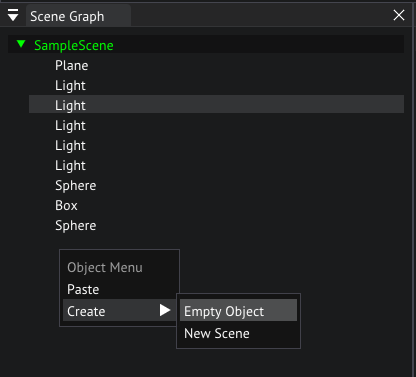
Creating a new object
Click on Add Component in the inspector and choose "CameraComponent" you can use the search bar at the top to search for it if you can't find it.
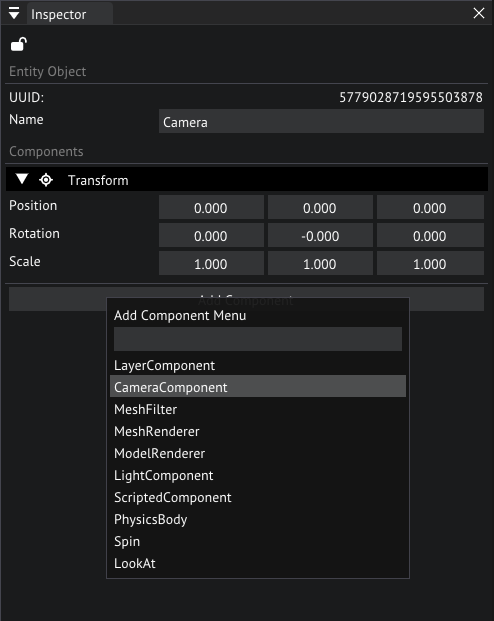
Adding a camera component
Set the Half FOV to 60 by double clicking the number and entering 60 on your keyboard. Do the same for Far but set this to 3000.
The display index will determine what virtual display we will be rendering to, with display 0 being the main display that will be shown to the player, so we leave it at 0.
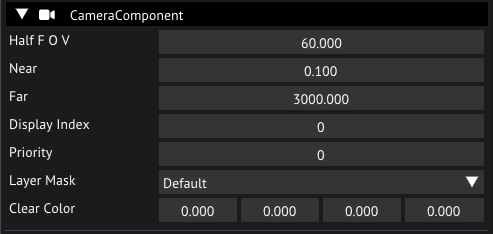
Camera settings in the inspector
Leave the Layer at Default, what layers are and how to use them is beyond the scope of this tutorial. You can play around with the clear color. Now move your new camera entity to have a view of our scene and switch to the Game tab to see a preview.
With the camera entity still selected, let's add a ScriptedComponent to it so we can add some custom behavior.
The CameraComponent requires a script, let's set it to the FlyCam that comes packaged with this template by clicking on the dropdown and selecting FlyCam.
This script exposes a Free Look Sensitivity property to manipulate the mouse sensitivity of the camera.

Script settings in the inspector
Why don't we have a look at this script, go ahead and navigate to the Scripts folder in the File Browser, now double click FlyCam.
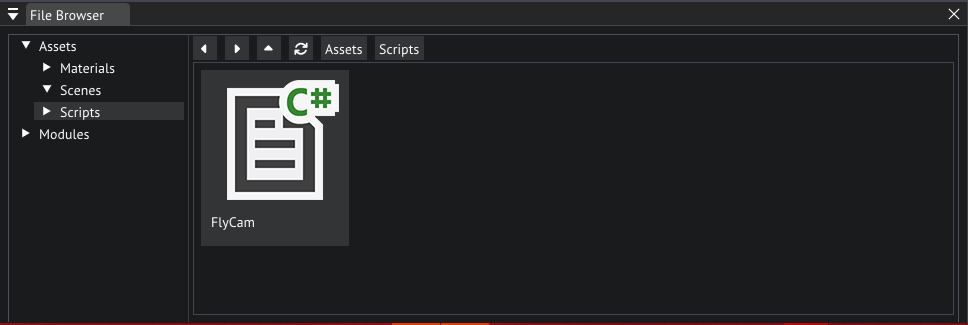
FlyCam script location in the file browser
This should open visual studio, if this is not the case it either means you do not have visual studio installed or the editor could not find your VS installation. If the latter is the case please refer to the mono preferences
Let's analyze the code.
using GloryEngine;
using GloryEngine.Entities;

namespace Sponza
{
    // Custom behaviors must inherit the EntityBehaviour class
    public class FlyCam : EntityBehaviour
    {
        // This our exposed sensititivity property that shows up in the editor
        public float _freeLookSensitivity = 1.0f;

        // We can cache the CameraComponent into a private field for later usage
        private CameraComponent camera = null;

        // The engine will call this function once when we hit play
        public void Start()
        {
            // Here we cache the CameraComponent on the current entity in the camera field
            camera = Entity.GetComponent<CameraComponent>();
            // This line tells the input system that player 0 will be using the Keyboard and Mouse input, more on this later
            Input.SetPlayerInputMode(0, "Keyboard and Mouse");
        }

        // The engine will call this function every frame while we are in play mode
        public void Update()
        {
            // We get the axes of the vertical and horizontal movement mappings
            float vertical = Input.GetAxis(0, "Movement", "VerticalAxis");
            float horizontal = Input.GetAxis(0, "Movement", "HorizontalAxis");

            // Next we get the axes of the mouse horizontal and vertical movement, note that these are deltas
            Vector2 mouseDelta;
            mouseDelta.x = Input.GetAxis(0, "Movement", "AimHorizontal");
            mouseDelta.y = Input.GetAxis(0, "Movement", "AimVertical");

            // Here we ask the Input system if the Use action was triggered during the current frame
            bool use = Input.IsActionTriggered(0, "Interactions", "Use");

            // Log the use activation in the console
            if (use) Debug.LogInfo("Use action triggered!");

            // These are some math calculations to move the camera
            // We start by getting the current position
            Vector3 pos = Transform.LocalPosition;
            // Next we'll increase that position by the amount of vertical movement (forward and backward) multiplied by our forward vector of our transform
            // We'll also add the horizontal movement multiplied by the right vector of our transform for strafing
            pos = pos - Transform.Forward * vertical + Transform.Right * horizontal;
            // Finally we'll override the position with our newly calculated position
            Transform.LocalPosition = pos;

            // These are the maths for rotating the camera
            Mat4 rx, ry, roll;

            Vector3 referenceUp = new Vector3(0.0f, 1.0f, 0.0f);
            rx = Mat4.Rotate(-mouseDelta.x * _freeLookSensitivity * Time.DeltaTime, referenceUp);
            ry = Mat4.Rotate(mouseDelta.y * _freeLookSensitivity * Time.DeltaTime, Transform.Right);

            roll = rx * ry;

            Vector4 newDirV4 = new Vector4(Transform.Forward * -1.0f, 1.0f);
            newDirV4 = roll * newDirV4;
            Vector3 newDir = new Vector3(newDirV4);
            newDir = newDir.Normalized;

            Transform.Forward = newDir;
        }

        // The engine will call this function every frame
        public void Draw()
        {
        }
    }
}
Now you should have a basic understanding of how to write scripts, but we'll write a new script later.
Input
You've probably noticed the various Input references in the script above. Glory comes with its own input management system to make it easier for you to bind your actions to multiple devices.
Let's have a look, open the Input settings by selecting View/Project Settings in the menu bar, and then opening the Input tab.
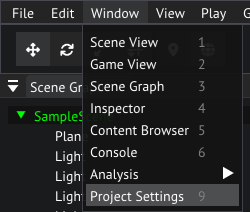
Opening project settings from the main menu bar
You'll see 2 headers here, Input Modes and Input Maps.
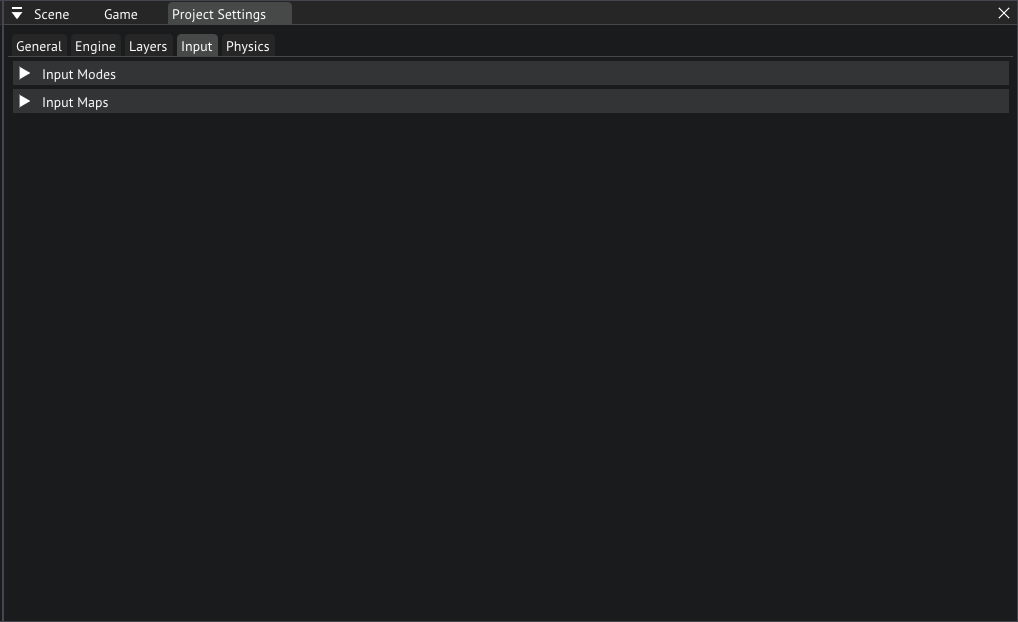
Input tab in project settings
Input Modes is where you'll create modes that define what input is being used, for example Mouse and Keyboard uses the mouse and keyboard devices, but you could also add a Controller mode that uses a gamepad.
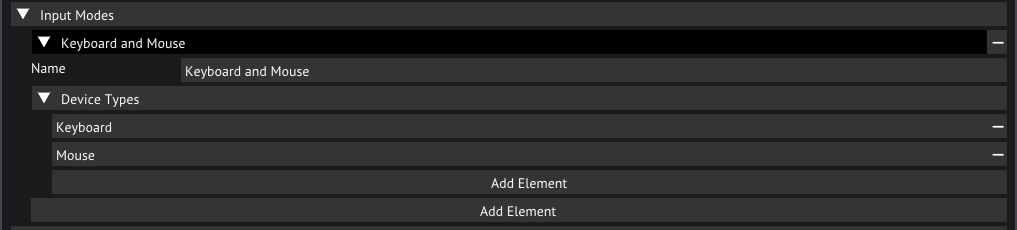
Input modes in the inpout settings
The Input Maps is where you will be defining your binds, for each input mode.
Open the Input Maps, you'll now see 2 maps appear, 1 for Movement and 1 for Interactions. Let's open the Movement map.
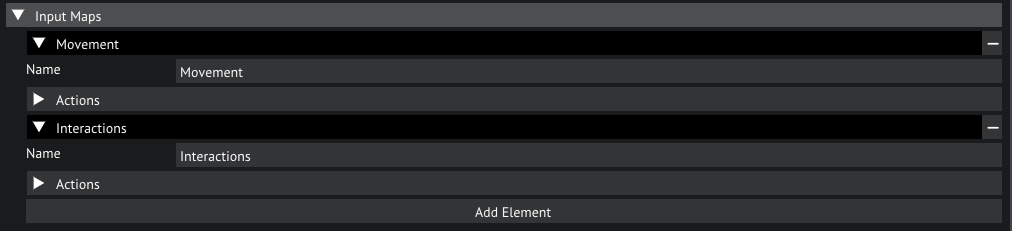
Input maps in the inpout settings
In this map we split up each axis into its own action. The vertical and horizontal axis of movement and aim are all mapped to a float and have a Lerp blending enabled. The float mapping means that it will map the raw input value of the device to the action as a floating point number. If we set this to Bool it will be mapped as either on or off. The Lerp blending blends the current value linearly to the new value rather than snapping it, which will make input feel more smooth. We can set this to Jump if we do not want to have any smoothing. SLerp is also an option, this is similar to Lerp but will blend the value in a smoother curve rather than a linear curve. Lastly we have the blending speed, this is how fast the current input will be blended to the new input. Note that this option is only available when Lerp or SLerp is slelected as blend mode.
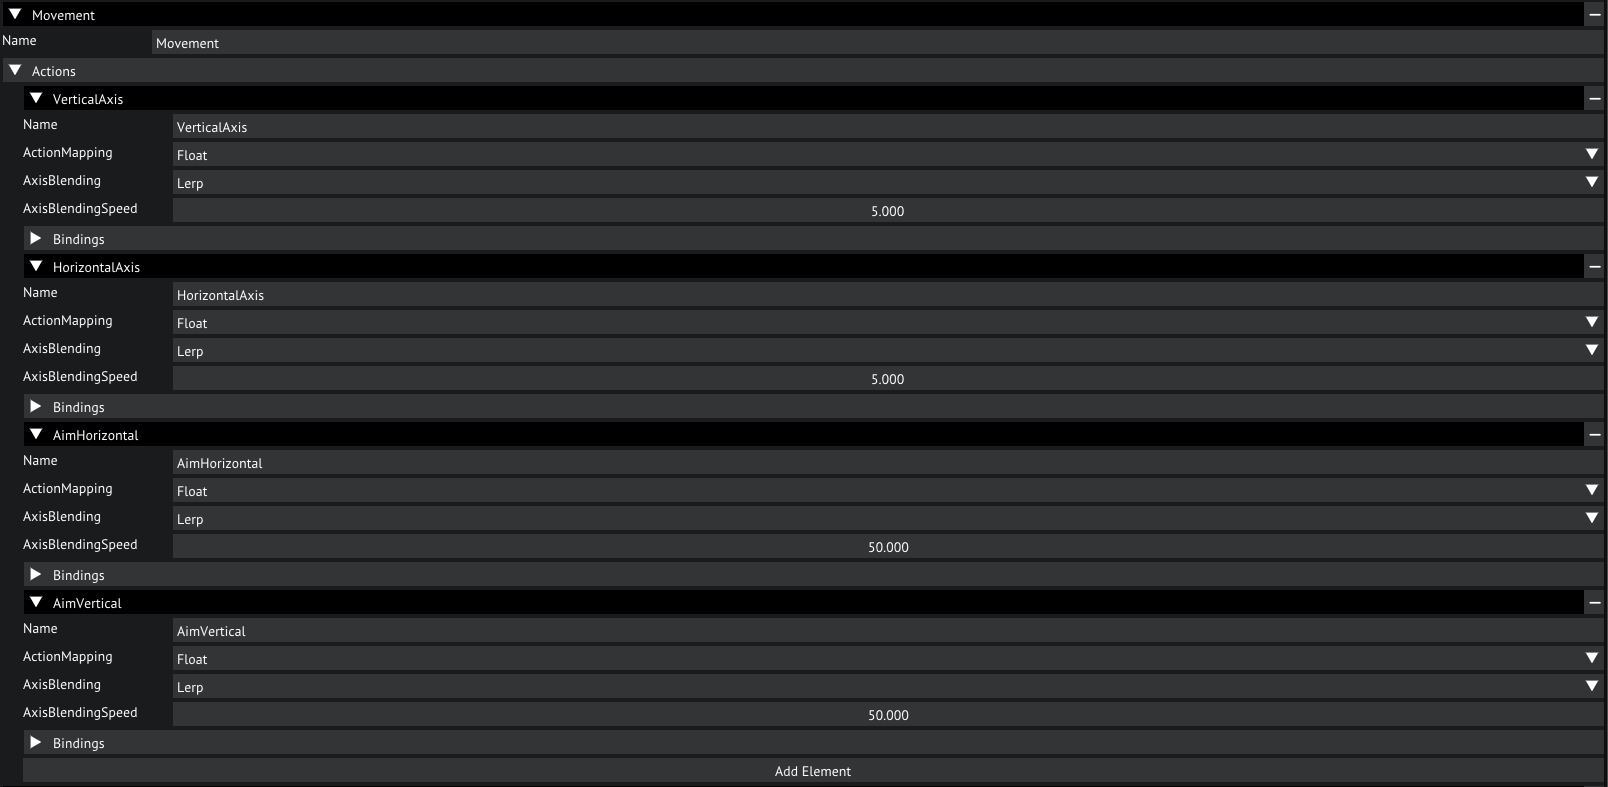
Movement map
Now, on to the bindings. Let's open that. Here we can see what bindings we have mapped to this action. Each binding has a multiplier, an input mode and a binding path.
The MapDeltaToValue option is especially usefull for analog aiming axes like a mouse.
The multiplier will multiply the input value by the chosen number, can be used to flip the signal or to simply scale it.
The Input Mode determines which input mode this bind will be active with, if a different input mode is active this bind will be disabled.
Lastly, the binding path. This defines which key or axis we bind to this binding.
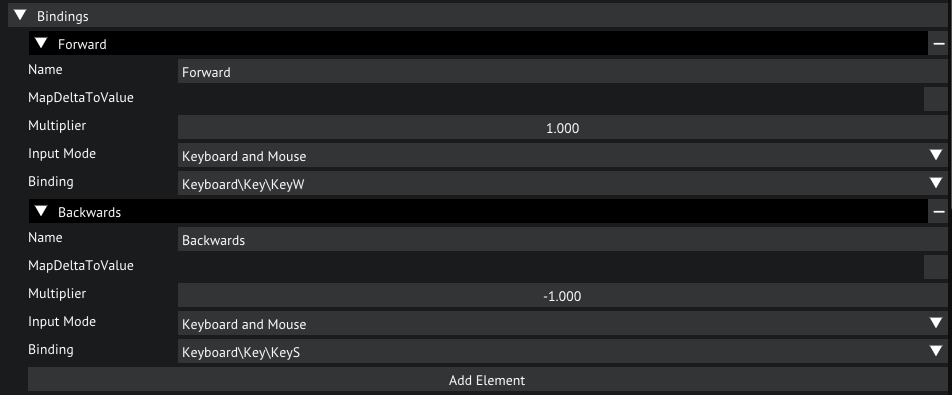
Bindings for the VerticalAxis action
Have a look around these settings, now you should have full understanding of how to make your own bindings and modes.
Make sure to save your project if you make any changes here by selecting File/Save Project.
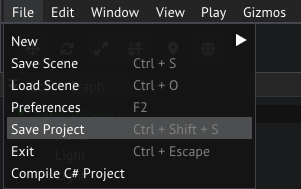
Saving the project from the main menu bar
Physics
How about we add some physics to this scene. Glory comes packaged with a jolt physics module, a module that implements physics using the Jolt Physics library.
To configure physics we go to the Physics tab in the Project Settings window. Here we can configure which layers can collide with eachother.
Let's make World collide with only World, and disable all the other collisions by unchekcing the checkmarks in the matrix accordingly.
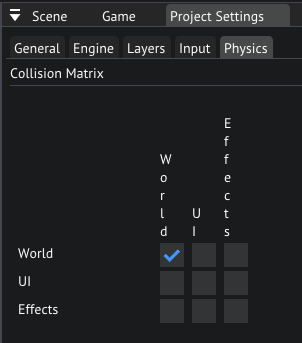
Physics collision matrix
The Jolt module also has its own configuration, you can find this in the Engine tab in the Project Settings window, and selecting Jolt Physics in the menu on the left.
We won't be going over what these settings do, leave them at default.
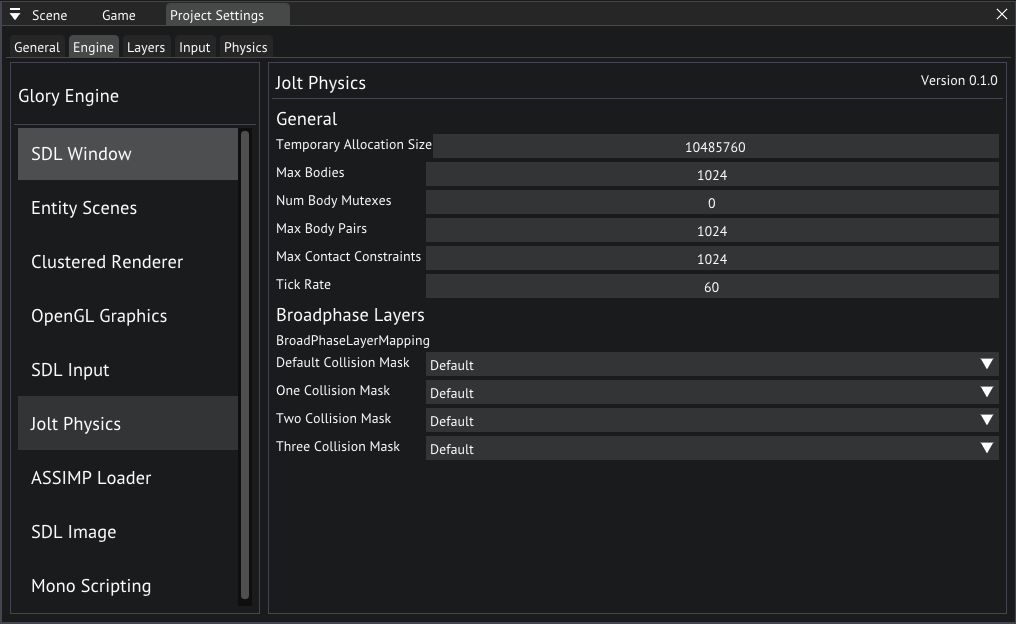
Jolt Physics settings
Now it is time to add some physics! Let's go back to our scene view and click on the ground plane.
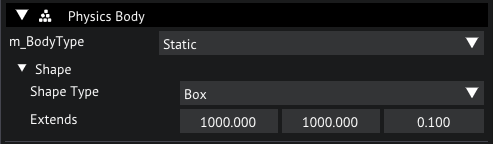
In the inspector, let's add a PhysicsBody component, since this will be the ground we want it to be static, so set the m_BodyType to Static.
Open the Shape and set the Shape Type to Box, set the Extends to {1000,1000,1}.
PhysicsBody for ground plane
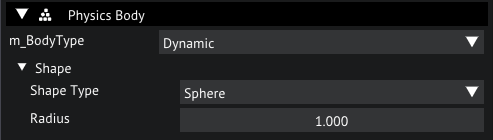
Now that we have a ground, let's add some Dynamic bodies, select the Sphere by clicking on it and add a PhysicsBody to it.
Leave the m_BodyType to Dynamic and set the Shape Type to Sphere. The default Radius should be the right size.
Let's do the same to the cube, but with a Box shape. Let's move both bodies up a bit.
PhysicsBody for Sphere object
Now hit play, you can see the cube and sphere fall until they hit our ground plane. It is possible to manipulate these objects while the simulation is running using the gizmos or the transform component properties.
Have a go at experimenting with other shapes and body types, you should now have the basics to create your physics worlds in your scene.
Scripting
Time to write a script! Let's write a script that makes the sphere jump when we hit the spacebar.
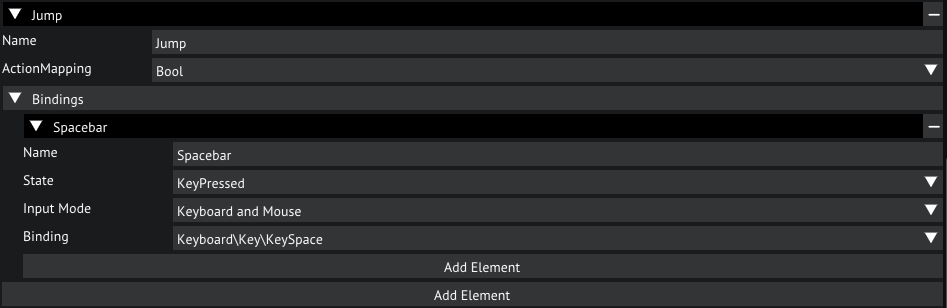
Before we do that we have to add the Jump action to our input. Open the Input Settings again and add an action to the Movement map by clicking Add Element under Actions.
Let's name this new action Jump and map the action to a Bool, we'll add a binding for Keyboard and Mouse and set the path to Keyboard\Key\KeySpace.
Also, set the State to KeyPressed.
Input settings for the Jump action
Now that that is out of the way we can write our script. Try writing it yourself before using the solution provided below.
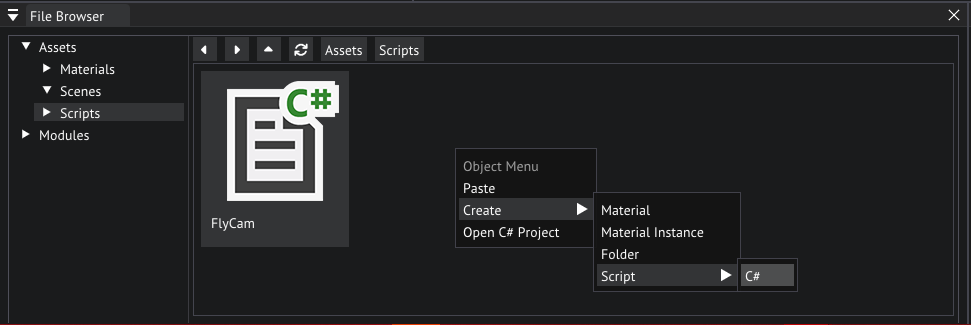
Let's make a new script by navigating to the Scripts folder and right clicking an empty space in the File Browser choose Create/Script/C#, name the script Jump.
Now open the script, and paste the following code into it (remember, try writing it yourself first).
Creating a new script
using GloryEngine;
using GloryEngine.Entities;

namespace Sponza
{
    public class Jump : EntityBehaviour
    {
        // The strength of our jump exposed as a property
        public float _jumpStrength = 10.0f;

        // A cached instance of the PhysicsBody
        private PhysicsBody _body = null;

        public void Start()
        {
            // Get the PhysicsBody from the entity
            _body = Entity.GetComponent<PhysicsBody>();
        }

        public void Update()
        {
            // Check wether the Jump action in the Interactions map was triggered this frame
            bool doJump = Input.IsActionTriggered(0, "Interactions", "Jump");

            if (doJump)
            {
                // Set the linear velocity to an upwards vector scaled by the jump strength
                _body.LinearVelocity = new Vector3(0.0f, _jumpStrength, 0.0f);
            }
        }
    }
}
You may have to manually compile your scripts by selecting File/Compile C# Project.
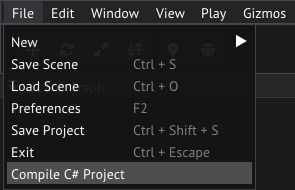
Compiling scripts from the main menu bar
That's it! Go ahead and add the script to the Sphere in the sample scene and try it out by pressing the play button and opening the Game view for a preview.
Press the spacebar on your keyboard to see the sphere jump!
Have a go at writing your own scripts, scripting is an essential part of the engine to make any custom behavior you desire. For a full API reference, please refer to the scripting seference.
Conclusion
You should now be familiarized with the basics of using the editor, creating new objects, adding components and writing scripts.
Now get started on your own games! The only limit is your imagination!